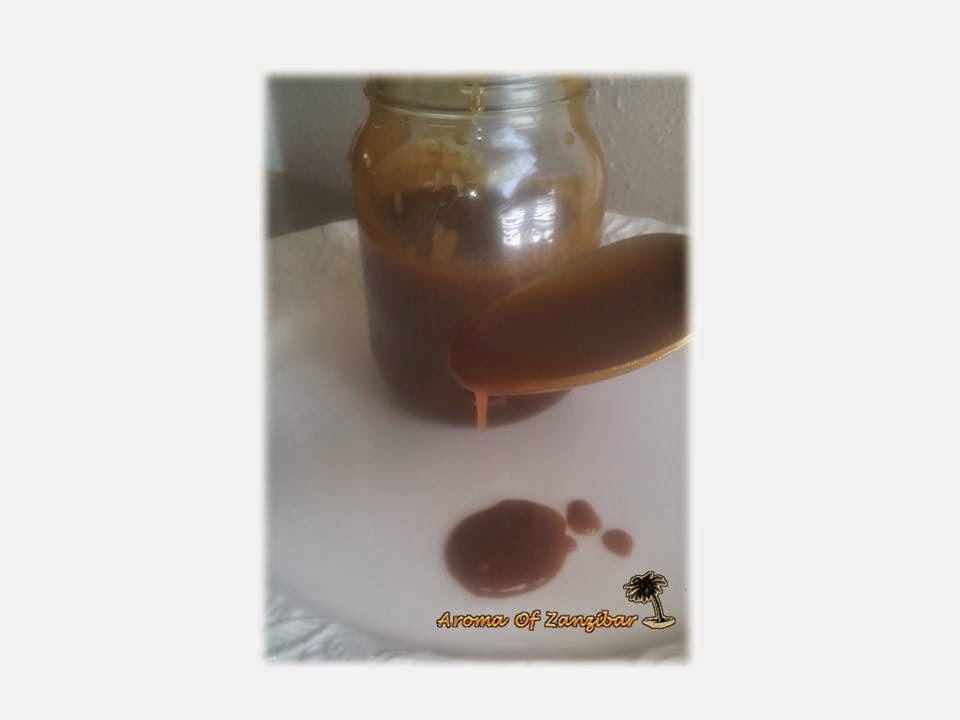
Caramel sauce is something I always have at home, its one of the best (add on's) elements that can turn a simple dessert or ice cream into a heavenly what ever you may want to call it!.
Homemade caramel sauce is perfect for cheese cakes, apple pie, fresh fruits, cake icing and the list is endless. It is very simple to make all you need is some patience...that's all ;)
Ingredients:
Sugar - 1 Cup
Water - 1/4 Cup
Heavy whipping cream - 1/4 Cup
Butter - 2 Tbls
Method:
Add water and sugar in the sauce pan on medium high, let the sugar cook do not stir
Brush off the excess water from the side of the pan , if any and as often as needed.
Once the sugar turns the color to amber, remove it from the heat and add the whipping cream and stir vigorously, Add butter and stir , put it back on the heat for 2/3 minutes. Once it has cool , pour it in a tight container and store it in the fridge
* Please make sure you use a heavy pan for this sauce.
My family, we are big fans of pasta, any kind especially my son. Since I cook pasta at least twice a week, I try to be very creative, and adding veggies is definitely one of them. This recipe is one of my quick and easy...tasty too. I do not use the tomato based sauce very much, most the times I prefer white sauce or just olive oil. When time permits I prefer to make fresh pasta at home, my kids love playing with pasta dough making various shapes and sizes
This recipe that I created and has lasted very long in my home, I was trying to replicate a pasta dish that I had long time ago at a very small restaurant in Dusseldorf , Germany. Whenever I travel I feel very safe eating only sea food and fish meals. The dish was shrimp and garlic and I decided to add spinach and bell pepper for
some extra color too. I loved this dish so much because it had plenty of garlic, what can I say..I love garlic too, and plenty of it as well.
Its a known fact that Pasta originates from Italy, precisely from Sicily dating back to as far as 1154. Typically, pasta is a noodle made from an unleavened dough of a durum wheat flour mixed with water and formed into sheets or various shapes, then cooked and served in any number of dishes. It can be made with flour from other cereal or grains , and eggs may be used instead of water.
Pastas may be divided into two broad categories, dried pasta and fresh pasta.
Both dried and fresh pasta come in a number of shapes and varieties, with 310 specific forms known variably by over 1300 names having been documented.In Italy the names of specific pasta shapes or types often vary with locale. For example the form cavatelli is known by 28 different names depending on region and town.
As a category in Italian cuisine, both fresh and dried pastas are classically used in one of three kinds of prepared dishes. As pasta asciutta (or pastasciutta) cooked pasta is plated and served with a complementary sauce or condiment. A second classification of pasta dishes is pasta in brodo in which the pasta is part of a soup-type dish. A third category is pasta al forno in which the pasta incorporated into a dish that is subsequently baked
Pasta sauces vary in taste, color and texture. When choosing which type of pasta and sauce to serve together, there is a general rule that must be observed. Simple sauces like pesto are ideal for long and thin strands of pasta while tomato sauce combines well with thicker pastas. Thicker and chunkier sauces have the better ability to cling onto the holes and cuts of short, tubular, twisted pastas. The ratio of sauce to pasta varies according to taste and texture, however traditionally the sauce should not be excessive as the pasta itself must still be tasted.
The quantity for the ingredients for this dish are not so precise you can use lesser or more.
Ingredients:
Spaghetti / Fettuccine or any long pasta
Large shrimps - 1 pound
Garlic - 2 big bulbs ( peeled and finely chopped)
Baby Spinach - 2 cups or more
Red Bell pepper - 1 ( Diced )
Olive oil 2 Tbls or more
Method:
Wash , clean the shrimps and keep them in a paper towel to drain
Cook the pasta as per the direction on the box
In a large sauce pan, add olive and keep on medium heat, add the garlic and sautee for a minute, be careful not to burn the garlic.
Add the shrimps and stir, add the bell pepper and saute for a minute or so, add the spinach and mix quickly, add the pasta and let it cook for 2 minutes . Ready to serve....Enjoy your meal!
Carrot cake is one of our family favorite cake, anytime of the year..sometimes with cream cheese icing and sometimes just plain, its just as good. What I like about carrot cake is that it has basic ingredients that most pantries at home would have, you do not have to go out of your way.
As usual, I love to track the origin of most of dishes that includes desserts too. So I found out that ;
"During the medieval period the sweetness were scares and very expensive. Carrot were used to sweet cakes since they contained more sugar than other vegetables besides the sugar beets and they were of course were much easier to come by so they were used to make sweet desserts. The origins of carrot cake are disputed. Recipes for carrot cake occur as early as 1827.The oldest known recipe of carrot cake dates from 1892, in a book of the housekeeping school of Kaiseraugst, Switzerland.
Carrot cake found its way in the United States in the early 1960 probably from Britain during the Second World War II; in the United States Carrot cake became commonly available in restaurants and cafeterias at first as novelty item, but people liked them so much that carrot cake became standard dessert fare.
And there's always other tales to make it more interesting; Another story indicates that following the Second World Warthere was a glut of canned carrots in the United States. A business man named George C. Page hired master bakers to find uses for the cans of carrots. He somehow promoted the idea of carrot cake to help create a demand for the product.
Many carrot cake recipes include optional ingredients, such as kirsch, cinnamon, nuts or raisins . The most common icing on carrot cake is icing sugar and lemon juice or icing sugar and kirsch in Europe and an icing with sugar, butter and cream cheese in the United State.
As the cake is relatively moist, it can be conserved longer than many other types of cakes.
How did carrot cake and cream cheese become a paired item is yet a story to be told......
Well, there are so many recipes and variations of carrot cakes out there. For me personally its not a question of whose's right or wrong its a matter of what your taste buds prefer.
The recipe am sharing here is a combination of 3 very good recipes and I have extracted the best elements from each to make one awesome carrot cake recipe and very easy to make.
Yields 3 8" pans
Ingredients:
4 Cups All Purpose flour
2 Tbls Baking Powder
2 Tabls Baking Soda
2 tspn Cinammon powder
1 1/2 tspn ginger powder
8 Whole Eggs
4 Cups Sugar
4 Cups Carrots
2 Cups + 2/3 canolla oil or veg oil
2 Tbls grated fresh ginger
2 Tbls orange zest
Nuts ( Pecan or walnuts) 1 cup or more
Method:
Preheat the oven to 350F and prepare Three 8" pans with parchment paper or grease and flour the pans.
Sift flour, baking powder , baking soda, cinnamon powder and ginger powder all in one big bowl and set it aside.
With Paddle attachment beat in the eggs and combine for about a minute
Add sugar and mix well
Add carrots, beat
Add oil, beat
Add fresh ginger and orange zest continue to mix
Add all the flour at once and beat well ensure all ingredients are well combined.
Pour the batter into the prepared pans and bake at 350 for 35-40 mins or till well done.
I finished my cake with cream cheese caramel frosting, I will add the link to the recipe here as soon as I have finished editing
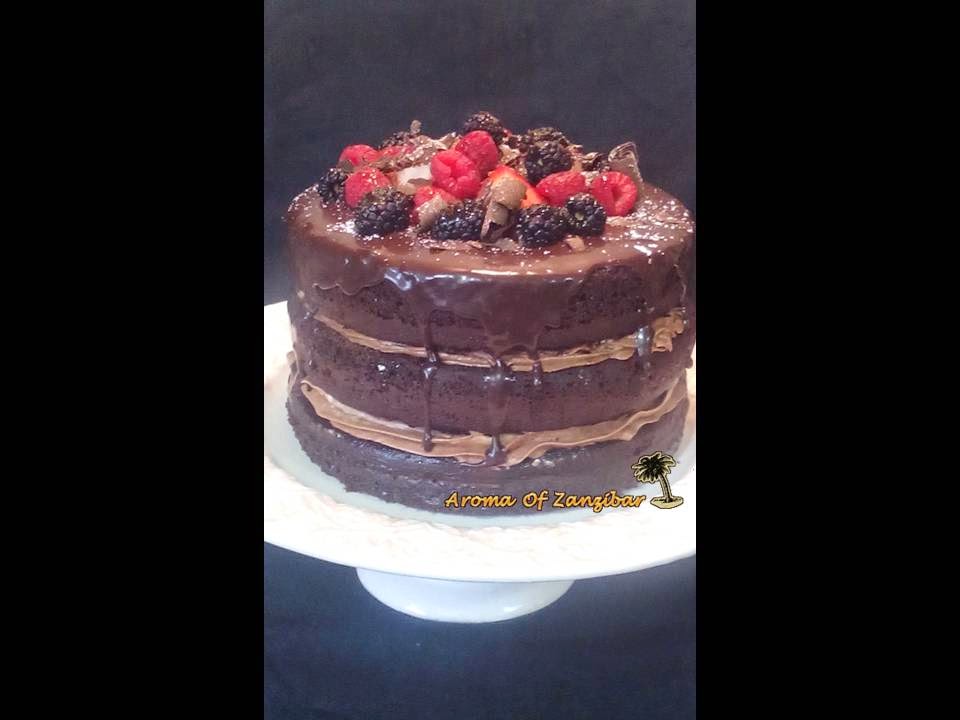
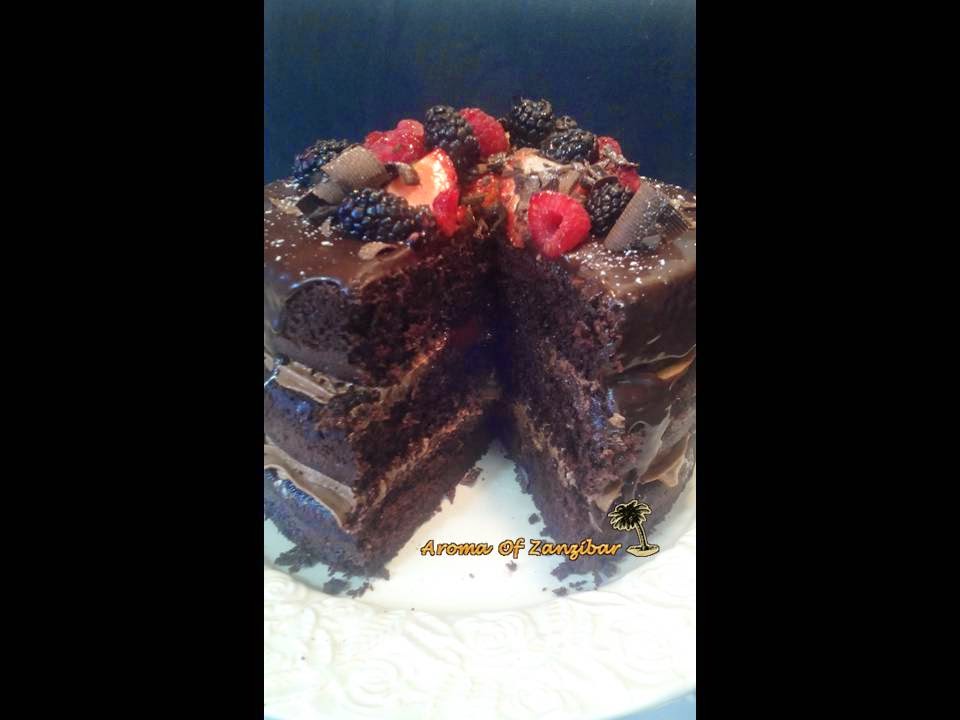
As am typing this, am also enjoying my wonderful chocolate cake which is by the way is very rich,moist and super delicious as my 4 year daughter Adilah would say..and the best part of it it is very simple and easy to bake it.
I love chocolate in any form so a rich chocolate cake is just another luxurious indulgence if I may say so. I am passionate about my desserts , I am very cautious when I prepare them. Some of them have some much details and take so much of my time but by the end of the day every minute and every ounce is just worth it.
I eat my chocolate cake like there is no tomorrow and then every morning I stand on that bathroom scale to check my weight hoping and praying that I have not gain a single ounce. If I could, I would have baked this cake as many times as I could but I have to play the safe game with my health although I do look for every opportunity to bake it.
So last weekend I had a potential client coming over for cake&dessert tasting for their upcoming event, amongst the few samples I made; my favorite chocolate cake was definitely a winner. The recipe produces 2 8" cakes so I reserved one for a rainy day..and I could wait to get a chance and attack. The whole week I was trying to think of some new chocolate flavors that would pair well.I have done so many variations and I was trying to find something totally new and awesome.
Well, to say the least I with so much planning I got so busy that I never had the chance to go grocery shopping this week at all and I decided to settle with some leftovers that I had in my refrigerator. I had enough to make another 2 8" chocolate cakes and was also delighted that I could make a video coz sometimes its just impossible to record a video with kids at home.
So now, let me show you how to make this gorgeous cake that will make you go crazy.
Ingredients: 1 3/4 cup All purpose flour 3/4 cup Cocoa Powder ( I used Hersheys) 2 cups sugar 2 tspn Baking Soda 1 tspn Baking Powder 1/4 tspn Salt 2 tspn Cinammon Powder 2 large eggs 1 cup Buttermilk 1/2 Cup vegetable oil 2 tsp Vanilla Extract 1 Cup hot Coffee Method: Preheat oven to 350F, and prepare 2 8" round pan with parchment paper or spread butter evenly and dust with cocoa powder.
Place all the dry ingredients in a mixing bowl. Run the mixer for 1 minute to combine all the ingredients. Combine and all the wet ingredients together except coffee. Add the wet ingredients to the dry ingredienst and mix well for about 3 minutes ( do not over mix) Add hot coffee and mix well, stop the mixer and scrape the bowl to ensure all the ingredients are well combined and mix for 1 minute. Divide the batter equally into 2 pans and bake for 25-30 minutes or untill done ( insert a toothpick to check ) Once its done, cool and enjoy with your favourite butter cream or frosting
Pilau is yet another aromatic and delicious meal of its own kind. Pilau is cooked together with any kind of meat be it lamb, mutton or beef and it can also be prepared with fish ,shrimps or vegetables etc.
Growing up , Sunday was not complete if we did not have Pilau, it is also served on special occasions, holidays, birthdays , and also for wedding lunch, this is usually on the night after the wedding reception and I must mention that I had the best Pilau ever in Zanzibar for my sister's lunch (wedding) this was done by a professional local caterer I believe her name is Tausi and the meaning of her name is "Peacock" well she does know what she's doing and ever since I have been trying to make that Pilau...Its been over 20 yrs and am still craving for it..;(
Pilau gets it flavour from the broth, as well as the spices however many people prepare it with stock or water. I prefer to make mine with broth and I make sure that the broth is well seasoned. Another way to make the broth is to use whole spices, I use whole spice but I wrapped it in a " Boquet Garni" , some like their Pilau lighter and some dark, it depends on how concentrated your broth is as well as the spices.
On reserching the roots and how Pilau reached Zanzibar, I would like to believe that it was brought by the Indians due to the vast and prominent Indian influence especially from Gujrat.
Pilau is also prepared and consumed in many countries and due to the vast spread of the dish, there are alot of variations of the name in many languages such as polou, palov,polu,polaao,pulao/pulav etc. The English spelling Pilaf is influenced by the Modern Greek Pilafi.
I also managed to find that the ancient Indian text Mahabharatamentions rice and meat cooked together, and the word "pulao" or "pallao" is used to refer to the dish in ancient Sanskrit and Kannada works.
And it is also believed that the proper preparation of pilaf was first documented by a tenth-century by a Persian scholar named Abu Ali Ibn Sina who in his book on medical science dedicated a whole section to preparing various meals including several types of Pilaf.
Persian neighboring languages:polow(rice cooked in broth while the grains remain separate, straining the half cooked rice before adding the broth and then "brewing"),
Serves 4-6
For the broth
2 pounds beef/lamb or mutton
1 Tbls Cumin seeds
2 Cinnamon stick
3 cloves
1 tspn whole cardamons
1-2 bay leaf
1/2 tspn peppercorns
Fresh garlic and ginger root
Use a cheese cloth and wrap and tie all the dry whole spices and make a "Bouquet Garni" and immerse it into the a large pot of water with your choice of meat. Mash the garlic and ginger and add. Cover and slow cook for an hour or so ( or until the meat is tender) you can use pressure cooker if you wish.
For the rice:
3 Tbls vegetable oil
2/3 large potatoes (optional) peeled and cut into half or quarters
1/2 onion diced
1 Tbls cumin seeds
1 Tbl pilau seasoning ( Masala) * check out the video on how to prepare this.
1 Tbls fresh ginger/garlic paste.
2 cups long grain
3 cups broth
Cooked meat
Salt to taste
* Wash and soak the rice for atleast 20 mins before cooking
Method:
In a large sauce pan , heat the oil and add the the potatoes and brown them
Remove the potatoes from the heat
Add onions and sautee till translucent, add cumin seeds stir for few minutes
Add Pilau seasoning and sautee, add the meat , stir and mix to combine
Add the ginger/garlic paste combine well and sautee for few minutes (do not burn)
Add the broth and potatoes and bring to a boil
Add the rice, bring to a boil. Let it boil for about 2 mins
Reduce the heat , cover and simmer for about 15-20 mins or until all the liquid is absorbed.
Reduce to lowest heat and cover tight for 15-20 mins ( or place in the oven at 350F for 20 mins)
Rice has always been a staple food in my home particularly for lunch, back home we always had rice for lunch and other types of food for supper/dinner. Rice is served with varieties of curries be it chicken, fish, lamb etc and vegetables or grains. Being a rice eater it is no surprise why am attracted to rice dishes from every cuisine and Persian is definitely among the few of my favorite that I have come across. Persian cuisine is very wide and extensive in it own unique way so I am only going to focus on the rice at the moment.
Long grains rices are widely consumed they are and graded based on where they are grown and the aromatic fragrance they produced. The closest I can get is Basmati rice which is equaly fragrant. Most rices are prepared with one or two additional ingredients varying from herbs, vegetables, meats, legumes, grains, nuts, dried fruits etc. and Safron
Theres a specific and unique approach to cooking Persian rice as far as I am concerned. The Basmati rice is socked in cold water for about an hour to remove the starch ; in some recipes its soaked with a lot of salt (up to 8 Tablespoons!!!) then par boil it in very salty water, its then drained and shocked cold water. Next you heat a pan with any kind of cooking oil preferably one the has no strong smell such as sunflower, canola add the rice to and pile it up in a shape of a pyramid and make holes and insert the butter cubes or sometimes without it. The rice is then well covered tightly and cooked on medium high heat for about 10 mins and then totally low heat for another 15 mins or so. This process creates a very a delicious golden crispy and crunch rice at the bottom ( Tahdig) and fluffy rice on the top.
I loved Persian food but discovered the passion sometimes in the 90's in Dubai, there was a restaurant nearby where I worked and we used to go on every chance and excuse we could come up with. The food was not only delicious; the buffet had such a spread and was ridiculously cheap. And you know whats next...I went out hunting for Persian cuisine cook book, I must say that I was disappointing not to find any !!
I could not understand why considering the obvious and large Persian population in UAE. Nevertheless, I managed to find one after many months of searching every Bookshop I could see. The book 'Persian Cooking A Table of Exotic Delights by Nesta Ramazani' is not one of those attractive with colorful pictures but I bought it anyways. It took me a while to figure out what I really wanted to learn since I was not familiar with the names and no pictures to guide me through... Now I can say that it is an excellent book and I am so glad that I picked it up
Today I am sharing with you two types of rice dishes which are my favorite especially Beghali Polo ( Dill rice) my other favorite is Javaher Polo (Jeweled Rice) it is very decadent both in the ingredients and the time and love to prepare it....I will definitely show you when get chance to make it.
The ingredients here they are just approximate due to the nature of the dish.
Serves 4 - 6
Ingredients:
Basmati rice - 2 cups
Fresh Dill or dried - 1/2 cup
Baby Lima Beans 1/2 - 1 cup
Cumin powder - 1/4 - 1/2 tspn
Salt - 3 tspn ( as per yr taste)
Butter - 3 Tbls
Oil - 1 - 1 1/2 Tbls
Safron - a pinch
Potato - 1 large
Dried Barberries or cranberries
Water to boil the rice - 6-8 cups
Method:
Wash , rinse and soak the rice for minimum 20 mins.
On medium high heat , bring to boil water with salt
Peel the potatoes and slice into round disks
Grind the saffron into a fine powder
Drain the rice and add to the boiling water
Let it cook for about 7 mins
Remove from the heat and drain, run some cold water for a minute
In a medium pan, add the cooking oil ( Medium high heat)
Layer the potatoes, sprinkle some cumin powder
Layer the rice , add the Lima beans, sprinkle some dill
Add another layer of rice, white or yellow ( however you prefer)
To color the rice with saffron; add 2 Tbls of hot water to the saffron powder , pour it into the rice and mix to combine till all rice is yellow.
Once you have finished layering the rice with the herbs and beans ( in shape of pyramid like so) make holes all the way till you touch the potatoes at the bottom . Insert the butter cubes.
Cover it very well so the steam does not come out, use kitchen paper underneath the lid. Let it cook on slow heat for about 30-45mins.
Plate it anyway you like it, garnish some dried berries before serving . Enjoy your meal with anytime of grill or veggies.
I confess...I am bread lover!! I think my passion and love for baking began with breads than desserts. I have always love bread of any kind or style and a home made one is even better so its not surprising that I love to make these pitas at home just because they are so tasty and so easy to bake...what more can I say!
So lets learn a little bit about Pita bread...as far as I know Pitta Bread is consumed in many Arab and countries and most countries that have the Arab influence such as Algeria, Morocco as well and the Balkan countries although they may differ a bit in preparations. It is also widely consume in Turkey as welll and as per Wikipedia the following are their findings ;
The word has been borrowed byTurkishaspide,[9]and appears in the Balkan languages asSerbo-Croatianpita,Romanianpită,Albanianpite,Bulgarianpitka. InArabic, the phrase "خبز البيتا" (pita bread) is sometimes used; other names are simply "خبز" 'bread', "الخبز العربي" 'Arab bread' and "خبز لبناني" 'Lebanese bread
Well there's nothing much to be stressed about this simple yet delicious bread I have it in my home almost every day its perfect for sandwiches, pita pockets , you can toast and make pita chips etc.
Recipe:
1 cup all purpose flour
2 cups whole wheat flour
2 tspn yeast
1 1/2 tspn salt
2 tspn sugar
1/1/4 cup warm water
2 Tbls olive oil
Method:
In a mixing bowl , place all the dry ingredients then add the water and olive oil and knead (dough attachment) for about 5 mins. ( If you are not using a you can the same result, after the mixture is well combined, you will knead for about 5 mins)
After kneading place the dough in a bowl that has been rubbed with olive oil or any oil to allow the dough to rise without sticking in the bowl. Cover it and let it rise for about an hour or double the size
Once it has risen. punch it down and divide and cut into 6 to 8 portions depending on the size you like.
Shape into small balls and keep it in a tray cover it and let it rise for the second time
Heat the oven to 450F
Sprinke some flour on the flat surface and place one ball (dough) and roll into a medium size cirlce , with about 1/8cm thickness
Place the bread into a baking tray and bake it for about 5/6 minutes. Serve warm or room temperature.
If you have any left overs , put it in freezer bag tightly closed.