Sunday, December 28, 2014

Potato Chops (stuffed potatoes)

Potato Chops with salad and roasted bell pepper coulis
So, here's one dish from Zanzibar that I believe has originated from the Indian subcontinent, for some reason the name Potato Chop has never made  real  sense to me. In spite of being the unknown child from wherever, it does taste very good. Its a perfect item for entertaining , side dish or snack bite. Its basically mashed potatoes stuffed with seasoned or spicy ground meat.
I have grown up eating potato chop as a something special when we had guests or at parties. Although it is served as an appetizer, or side dish; in my house I like to serve it as a main dish with soup and salad and of course some condiments to take it to the next level. 

The measurements of the ingredients are not so accurate , it all depends on your taste buds, this is how I do mine the old fashion way although I have eaten some potato chops were the meat was not so dry it was more saucy , some add peas....well here's my way of making them...and we love them with either hot sauce, ketchup, garlic sauce, sour cream , salsa  or coulis the choice is yours


Ingrediest:
Potatoes about 1 lb ( peeled , boiled and mashed)
Ground Beef 1/2 lb
Onion 1/2
Cilantro - 1/4 bunch
Garlic - 4 cloves
Ginger - 1 tspn
Cummin powder 1 tbls
Lemon/lime 1/2
Green pepper - optional
Bread crumbs - 1/2 cup
Eggs 2

Yields 8


Brown the meat

Once all the liquid is dried, add cumin powder. Sautee for 2 mins

Add chopped onions, mix and let it cook for about 3 mins

Add chopped ginger and garlic and cook for 2 mins

Add cilantro and lime

Add some salt and pepper to taste

Place the mashed potatoes on the palm of your hand

Place the cooked meat

Place another portion of the potato on the other hand

Place on top to cover

Shape it into a ball


Use bread crumbs, I prefer Panko

Beat the eggs lightly and dip the potato ball
Roll and coat with bread crumbs
Keep them in the fridge for about 10 mins

Deep fry for about 2/3 mins on each side or until golden brown


Plate and serve anyway you like

Butter Chicken


Any one who knows me better will tell you the love affair between me and the Butter Chicken, it is one of favorite Indian dishes ( No 1 is Hydrabadi Biriani;) . 

I must say this dish took forever to get it right. All recipes I came across did not
seem next to perfect.

The first recipe given to me was by a friend's mother in Dubai sometime in 1990's and ever since then I used the base and tried to mix with or alter it with other recipes but all in vain...guess what I never gave up.
Believe me when I tell you that I have had recipes that had one hell of tomatoes and all I could taste was the acidity from the tomatoes....
About two years ago while looking for Hydrabadi Biriani which is another story of its own....I finally found a wonderful recipe for this dish that I love so much and yet I did make some changes too...after trying so many recipes I found some ingredient was missing or extra on every recipe, so I compiled the ones I wanted in short this recipe is inspired by Chef Vah Reh Vah

I must say that most recipes that I tried or just browse thru had had the same ingredients but the key here is the method tor technique if you want to call it that makes a whole lot of difference. I prefer to use the Tandoori masala coz it eliminates alot of other spices that I do not have and I don't want to purchase them just because of this one dish. I posted this dish in one of the facebook cooking group and one of the member asked me what it was, and I mentioned that it was Butter Chicken, and she goes wow, I love it but I have never made one coz I heard it has 30 ingredients.!!!! so of coz I extended mine which has about 15 ingredients lol ;)


Now grab your pencil and paper for the ingrediensts

Tandoori Masala - I like the brand Rajah
Lemon 1 
Salt 1 tsp
Cashew nuts - 1/4 cup
Cummin seeds - 2 tspn
Fresh garlic - 1 Tbls
Coriander powder - 1 Tbls
Garam Masala - 1 Tbls
White Onions - 01 
Fresh tomatoes (6 pcs) or crushed tomatoes/ canned diced tomatoes 
Fresh cream or whipping cream/half and half 1/4 cup
Chicken - 1 boneless breast
cooking oil -2 Tbls
Butter 2 Tbls


Please click on the video below for the method


Tuesday, December 23, 2014

Chocolate Ganache ( Milk Chocolate)

Ganache is one of my favourite , never enough and always a have some in the fridge, whenever I need to whip something quick, a cake, dessert, pastry...you name it, and ganache comes in handy.


 Just like so many other delicous and rich things that am crazy about...Ganache is also a French origin which simply refers to luscious glaze made from cream and chocolate and of coz anything chocolate is DELICIOUS!
You can also add flavoring such as vanilla or cinnamon if you wish.

The greatest thing about the ganache is its very simple to make and has only 2 ingredients!!! and you make wonders with it because its so very versatile.

As we go along , I will show you so many different recipes that uses ganache from a glaze, to a filling, to frosting to mousse and the list goes on and on....

Ganache may vary depending on the ratio of chocolate to cream and also the type of chocolate it all depends on what you are looking for .  You can also make white, or dark chocolate ganache but the ratio is different. 

White Chocolate 3:1
Milk Chocolate 2:1
Dark chocolate 1:1

Theres so much to write about ganache but I have decided to make it very short and simple.


Ingredients: 

1 part Heavy Whipping Cream
1 part Chocolate 
Butter & Corn syrup (optional)

Method:

Heat the heavy whipping cream to a boil in a mocrowave or stove top

Pour it in the chocolate, cover it for few mins 4/5 mins

Stir and mix to ensure the all  chocolate is melted, whip it and add the butter and corn syrup if you are looking for the glossy and shinny affect. Whip it well , cover it and keep it in the fridge.

Tuesday, December 9, 2014

Simple Moist & Perfect Red Velvet Cake


Well, here I am after I think 3 months of agony...you may wonder why, but I feel writing this blog has never been as easy as I thought it would be; its either the camera or the stand or the computer...some how they don't seem to work in harmony.
(Don't look at the slice of this cake over here...isn't it gorgeous?)

Now that I figured out that I can use my husband's laptop to edit my videos, life might become easy and I am gonna try to make my posts as short as possible so I can catch up with my backlog coz my phone cant hold anymore pictures or videos...yes, I am recording it from my phone! Well like I mentioned something or the other ought to go wrong but am not letting it happen, camera broke down and guess what I think my phone does a better job anyways!

So I guess its the Christmas atmosphere with the red and rich colors that got me into the mood of Red Velvet cake but I had to wait impatiently for 2 days to make this cake that I so much love and yes I have been craving for this cake so badly....

Well ...as usual I like to research the origin of the food I prepare, its interesting to know how the names or the flavors were developed. I found a lot of articles in google but this one below seem pretty informative and very well written by Tori Avey and I just copied the paragraph below but if you  wish to read more of this wonderful cake you may visit her link http://toriavey.com/history-kitchen/2014/02/red-velvet-cake-history-recipe/


"A proper red velvet cake is moist and soft, with a slight tang, and not overly sweet. The flavor of cocoa is vaguely present, but not pronounced. The original red velvet was made from vegetable shortening, which produces a tender crumb and light texture. Variations developed using butter for more flavor, which turns out rather dry, or oil for extra moistness. The common denominators in all authentic versions are buttermilk or sour milk, baking soda mixed with vinegar, and, of course, red food coloring. The vinegar and buttermilk react with the cocoa to produce a brighter red hue in tangent with the dye. The cocoa is dissolved in the food coloring to produce a uniform color. Skimping on the food coloring only results in a pink tint. The more cocoa, the browner the tint. Although some well-intentioned cooks use beet juice or cooked beets for coloring, these do not provide the intensive tone. (It is a myth that beets were originally used to dye red velvet cakes — the result is simply a chocolate cake with beets and an earthy flavor –- and sugar beets are white in color). Sorry, but a bona fide crimson hue requires food coloring and a lot of it. If you don’t want coloring in your food, then make a classic red devil’s food cake or brown velvet cake, which will lack the bright red color and mild flavor.
To its detractors, red velvet cake is vulgar and insipid. To its devotees, however, the cake is a spectacular slice of bliss and a favorite comfort food. The resplendent cake serves as a traditional treat for birthdays, Christmas, Fourth of July (you can add some blueberries to the frosting), and Valentine’s Day and a basis for many wedding cakes as well as groom’s cakes. For St. Patrick’s Day, green food coloring is substituted in the batter for the red."

After so many trial and errors in such of a perfect moist Red Velvet cake , I decided to try particular recipe from "Divas can cook" its very moist and its very simple and the secret to getting it so moist is not to over mix and that's why I usually use a hand mixer to make it.

English version, coming SOON! 


For the cake:

2 Cups All Purpose Flour
1 tspn Baking Powder
1 tspn Baking Soda
1/4 salt
2 Tbspn Cocoa Powder
2 Cups Sugar
1 Cup Canola Oil/Vegetable Oil
2 Eggs
1 Cup Butter Milk
1/2 Cup Coffee ( I use 1/4 spoon  decaffeinated coffee)
1 tspn white distilled vinegar
1-2 oz Red Food Coloring

Pre heat the oven at 325F.
Grease and flour 2, 8" pans or use parchment

In a medium size bowl sift all the dry ingredients and keep aside.

In another bowl pour the oil and the sugar, mix to combined then add the eggs, butter milk and the Red food coloring, mix well.

Add the coffee and the vinegar and beat with hand mixer for about 2 minutes or so.

Now add all the dry ingredients at once at mix on low speed until well combined, increase the speed and scrap the bowl to ensure all the ingredients are well combined DO NOT OVERMIX you will cause your cake to be dried.

Pour the batter equally into the pans and bake for about 35-40 minutes


Most of the times the Red Velvet cake is frosted with Cream Cheese Frosting/icing but there are occasions that I have done it with Swiss Meringue Butter Cream which is absolutely tasty too but today am sticking with the Cream Cheese Butter Cream.
The most crucial point to getting a perfect cream cheese butter cream is to have the Cream Cheese and the Butter in room temperature and that would solve all the mysteries.

Ingredients:

3 Cups Cream Cheese
1/2 Cup Butter ( 1 stick)
2 Cups confectionery sugar
1-2 tspn vanilla essence
(Video ccomingsoon)

Beat the cream cheese until nice and smooth, add the butter and beat for few more minutes, start adding the confectionery sugar one cup at a time until you reach the consistency you are looking
for but most of the times 2 cups are just enough.


This is how I decorated my cake, my skills in this department suck but I will get there some day but in the meantime enjoy the cake.


Now this cake is beautiful, don't you think!


Thursday, September 4, 2014

Silky New York Cheese Cake (with oreo base)


Let's start with this...Did you know that Cheese cake actually originated from GREECE! I didn't and I have never heard of Greek Cheese cake, I know there's the famous New York Cheese Cake, French Cheese Cake which I tried once and hope to share with you someday , there's also Japanese Cheese cake which looks as soft as Cotton; that's still in my wish list. 
I like to know the history of most of the food that I cook and keep them as my bedtime stories for my kids when I run out of things to say ;) So, yes Cheese Cake recipe is about 4,000 years old to Ancient Greece.
 
Its very difficult to describe a "perfect" Cheese cake coz every one has their own individual way and things that you look for it could be the crust, the tanginess, the sweetness and the texture etc..etc...
  
I got this recipe from Joe Pastry's blog, he can tell you all the science and chemistry, do visit his page for more information. I have tried it with few minor changes, some worked some did not work for me, it could work for you depending on what you are looking for.


 (Shhhhhhhh, New Yok cheese cake does not have a CRUST!!!!) I still need to figure out how to get my crust to stay crusty..its soggy ;
  
Before you start to you need to make sure your ingredients are at room temperature, that's the secret to getting a great Cheese Cake, coz if your ingredients are cold ; especially the cream cheese, when you whip you will find the lumps and you will need to whip it longer to remove the lumps and over whipping causes your Cheese Cake to crack..GOT IT!
 
For the crust you can use about 10 gram crackers about 2 cups. I used 2 packets of 10s although in the video I have shown only one.
 
Preheat your oven to 400F
For the Crust:
 
 
20 Oreo biscuit sandwiches ( 2 Cups )
3 Tbls butter
 
Spread in an 8 or 9 inch spring form (depending how tall you like your cheese cake to be) if you are using a normal baking pan, you will need to line it up with parchment paper.
Spread the crumbs evenly and bake for about 5-7 mins. Let it cool before you pour the cheese cake batter.
 
 
Bring your oven down  to 350F  and set a rack on a middle shelf

 
For the Filling
 
 
lb. 2 ounces cream cheese
7 ounces sugar
1/2 teaspoon salt
2 teaspoons vanilla extract or lemon zest if you wish
4 eggs
1 lb. 8 ounces sour cream (you can also use heavy cream, or any combination of the two)
(In the video I used 1lb sour cream and 4oz whipping cream and 4 oz sweetened condensed milk)
 
 
1. Combine your cream cheese, sugar and salt in the bowl of a mixer……and beat several minutes until smooth and creamy, scraping once or twice during the process.
 
2. Add in your vanilla and beat about 20 seconds more. Scrape.

3. Beat in the eggs one by one, again, scraping once or twice along the way.

4. Add the sour cream in three additions, and yes scrape! Mix a few seconds more.

5. Pour the mixture into the prepared pan.

Cover the pan with aluminum foil to prevent any water get in your cheese cake - no you don't that to happen!

 
6. Put the foil-lined pan in a larger shallow pan, and add an inch or so of hot simmering water.

Bake 45 minutes at 350, then turn off the oven and — without opening the oven door — bake for an additional hour as the oven cools. 
 

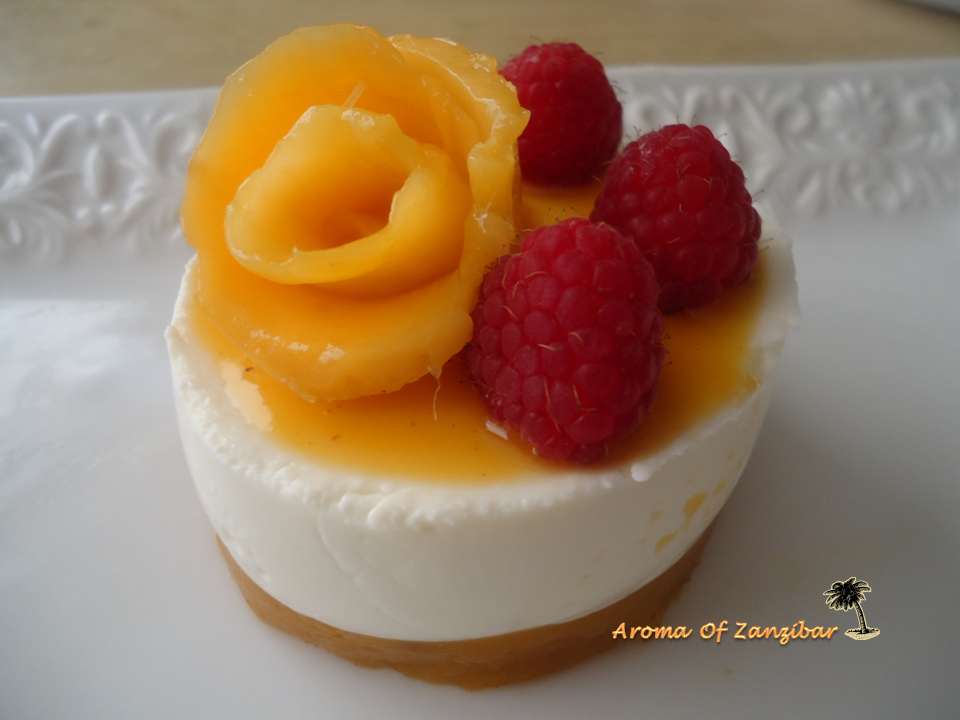
Allow the cake to cool for at least an hour at room temperature, then chill it for a minimum of 3 hours, preferably overnight. The next day, remove the ring and the parchment paper, slice and serve. You can get whatever topping you desire but this is good without it. 


Thursday, August 28, 2014

Vanilla Bean Panna Cotta


Okay! I have been planning to make Panna Cotta for quite sometime since I discovered
the frozen Passion Fruit Pulp at Walmart, (in the latino area) other than that, I had already done my research on how to get the perfect ones so I have been patiently impatient if you know what I mean. Now this Italian dessert is just a delicate thing that does not require a list of so many ingredients to make it perfect.

What is Panna Cotta? or a good Panna Cotta!!? After experimenting and reading tons of blogs as usual, I found the 3 keys to a perfect Panna Cotta from an article by Russ Parson in Seattle Times, the reason why I agree with his findings its because I have tried couple recipes and the ratio that he has given , gave me the perfect desired Panna Cotta. As mentioned by him ; The Jiggle, The Cream and the Sweetness. Basically these 3 elements need to come together in harmony..no over powering issues here. The jiggle is the ratio of gelatin to the liquid, I obviously like my Panna Cotta well set with some kind of body and not rubbery and that would be 3/4 tspn of gelation per cup of liquid in (cream). The cream is very light and does not leave that heavy fat taste in your mouth. I have also done this with coconut milk which is also another perfect combination with the fresh fruits. The Sweetness , for those who are not so sweet people; you don't have to worry about its hardly there and the topping of fresh fruits and various other elements that you may choose to use will take this delicate dessert to a whole new level.


Panna Cotta is mostly a  summer dessert but I like to make it anytime of the year and more ofcourse in summer coz I get to make use of the fresh fruits to make coulis , syrups or just simply display them on their own. Its a very light dessert perfect after a heavy meal. Its easy to prepare and best if its done in advance so that takes away a lot of pressure when you are entertaining  Panna Cotta can be presented in any way that makes you comfortable, as simple, delicate and fancy as you want it to be, either in a mold, dessert glasses or ramenkis , I chose ring molds coz I cant wait to use my acetate sheets that I recently purchased.


For the Panna Cotta:

2 tablespoons water
1 tablespoon powdered gelatin
2 1/2 cups heavy cream
1  cup whole milk
5 tablespoons sugar

method:


If you are using ramenkins wipe the insides of 8 (one-half-cup)  with a light coating of neutral oil and set aside.

Please do not get confused in the order on how this is prepared. You can start with fruit base or Panna Cotta or either way. Since I wanted my base to be fruit which in this case it is Mango and Passion Fruit, I will start to make the fruit basis first. Another thing that I want to mention here is the use of unflavored gelatin.  I use Halal gelatin you can use which ever gelatin you are comfortable with the brand or type should not make any difference.

You can use fruit puree of your choice canned or fresh, if using fresh do simmer for few minutes coz you need the gelatin to melt.

For the fruit gelee it all depends how thick or thin you want it to be. I used more gelatin for the base and less gelatin for the top like sauce/syrup consistency.

For the fruit gelee I used as per the directions on the box which is a base of 500ml liquid with 3 tspn gelatin.What I needed was only 1/2 cup or 4oz/125 ml of mango/Passion fruit and 1 1/2  tspn gelatin (I used more gelatin) It set perfectly for the mango almost the same consistency as the Panna Cotta  but for the passion fruit it needed longer time. 


I warm the passion fruit pulp in the microwave and then or sprinkle gelatin powder


Stir to mix until its dissolve and there are no lumps , keep it aside to cool


I had a lot of mango pulp , so I heated it all and then I just used the little amount
required for the dessert
  

 I got my ring molds ready and inserted the acetate sheets to the desired   size, likewise assemble whatever you may need to serve the dessert.


                                          I used aluminum foil to cover the base


Once the fruit gelees has cooled pour in the container/mold etc, and let set, this may take few hours

For the Panna Cotta:
2 tablespoons water
1 tablespoon powdered gelatin
2 1/2 cups heavy cream
1  cup whole milk
5 tablespoons sugar


In a small saucepan, combine the cream, milk, sugar and split vanilla  bean, and bring to a simmer over medium heat.


                               Sprinkle 1 Tbls of gelatin over 2 Tbls of water and let it dissolve


Remove from heat, and whisk in the softened gelatin and the vanilla extract. If you are
using vanilla bean scrape the vanilla seeds from the bean pod into the mixture, and discard the pod.

Let the cream mixture cool before you pour it into the containers/mold etc and set it in the refrigerator for 4 hours or so ( I kept mine over night)


Oops! I did not cover the molds tight enough the panna cotta managed to spill under.


With mango gelee at the bottom and mango coulis on the top


About 10 minutes before serving, run a thin-bladed knife around the inside of the ramekin. Wrap the ramekins with a warm/hot towel to help smooth release, If the panna cotta doesn't unmold right away, tap the ramekin lightly on the countertop to loosen it or run it under hot water for few seconds. Panna cotta can also be served without unmolding in a dessert cup/glass , bowl  or so.


With fresh Passion Fruit


 With passion fruit syrup at the bottom and pomegranate coulis